

Building your breast milk stash can feel a bit overwhelming when you’re still exclusively nursing around the clock. But it’s easier (and more empowering) than it sounds. For many Aussie mums, the why is crystal clear: a solid freezer stash means you can step back into meetings, slip into a yoga class, or finally enjoy that long‑promised brunch with friends, without bub missing a drop.
We get the reality of juggling sleepy feeds, cluster‑feeding evenings, and the countdown to returning to work. Let’s walk you through a practical roadmap from zero storage bags to a confidence‑boosting buffer.
Why Bother: The Perks of a Breast Milk Stash
A breast milk stash is simply any extra expressed milk you store for later. Whether that’s a single pouch tucked behind the frozen peas or an entire shoebox‑sized basket of neatly labelled bags. The goal? Freedom on demand. With even a small reserve, you can:
-
Ease back into work: Send bub to daycare with bottles that match their usual feeds, so you can focus on clients or spreadsheets without a racing mind.
-
Say yes to life’s curveballs: Last‑minute dentist appointment, urgent vet run, or a friend’s wedding toast? Your stash has you covered.
-
Share the night shift: Let your partner handle a 2 a.m. feed while you bank a solid sleep cycle.
-
Handle the unexpected: Power outage, bushfire evacuation, gastro bug? Spare milk buys precious time.

You don’t need a giant chest freezer full of stashed breast milk; just a few extra feeds can give you breathing room. And of course, expressed breast milk only stays safe in the fridge or freezer for so long. If every centimetre of freezer real estate is already spoken for by meal‑prep lasagne, keep in mind that you can freeze‑dry your breast milk with Nourishy for a shelf‑stable stash that lasts up to three years (no ice crystals required).
How Much Breast Milk Should I Stash?

The short answer is it depends. A “good stash” isn’t a magic number – it’s whatever lets you walk out the door without that tight‑chest worry. Your ideal stash size hinges on how often you’ll be away from your baby and how long you want breastfeeding to stay centre‑stage.
A Stash Size for the “Occasional Outing” Mum
If you work outside the home casually, study from home, or only need the odd date night, a rolling two‑day buffer (about 4 – 6 feeds) is usually plenty. Pump a little extra each morning and rotate yesterday’s milk into the freezer while using today’s fresh milk first.
A Stash Size for the “Back-to-Full-Time” Mum
If you plan to return to your 9 – 5 job after three months of maternity leave, but you want to breastfeed for longer, aim for a 5-day stash.
Why five days? It gives you a full work‑week cushion to start off with while you establish your on‑the‑job pumping rhythm. Once you’re expressing at work, you’ll top up the stash as you go, keeping a steady 1–2 week safety net for growth spurts, public holidays, or sick days. Use the following formula to give you guidance:
Formula to Calculate Your Stash Size
(Daytime Feeds you’ll miss × 1.25) × 5 workdays = Your Starter Stash Bags
For most babies, the Daytime Feeds you’ll miss are 3 per day.
E.g. (3 × 1.25) × 5 workdays = 18.75
To make it a rounded number, we can estimate 20 milk storage bags for a starter stash.
|
Calculation |
Example Volume |
|
3 feeds × 1.25 = 4 bags per day |
≈ 480 mL |
|
4 bags × 5 days |
≈ 2.4 L total |
How to Build Your Breast Milk Stash While Exclusively Breastfeeding
- Slow and steady: Add one extra morning pump for 3 – 4 weeks.
- Weekend “power hour”: One double‑pump session while baby naps can bank an extra 100 ml.
- FIFO: Use the First In First Out fridge and freezer method.
- No freezer storage: Send your surplus to Nourishy to freeze‑dry into a pantry‑ready powder; perfect if you want a three‑month reserve without commandeering the family freezer.
When Should I Start Pumping to Build My Stash?
Most lactation consultants suggest starting 2 – 4 weeks before you know you’ll be routinely away from baby, long enough to snowball a cushion, but not so early that you stress your supply or your sanity.
Tip: If your output stalls, try a power‑pumping blitz (we outline the 20‑min/10‑min pattern in our Power Pumping Guide) to nudge supply upward. Stick to this plan for two weeks and you’ll bank roughly 1.5 – 2 litres, the starter stash we recommended for a full‑time return.
Can I start pumping while I’m still pregnant?
Yes, antenatal hand‑expression (small amounts of colostrum) can be useful if your care team advises it. For example, when gestational diabetes or a planned Caesarean might delay that first latch. But routine electric‑pump sessions before birth aren’t recommended; nipple stimulation could trigger contractions, and your mature milk won’t be in yet.
Did you know? If you have hand‑expressed a few syringes or bags of liquid gold during late pregnancy, Nourishy can freeze‑dry colostrum or transitional milk too. Simply label it “colostrum” before shipping and we’ll transfer that designation onto the pouch you receive back, same gentle process, just for the earliest, precious drops.
How Often Should I Pump to Build My Stash?

Pick the Prime Windows
- Morning surplus (05:00 – 08:00): Prolactin peaks overnight, so a 10‑ to 15‑minute double‑pump right after the first feed can net a tidy 60‑90 ml.
- Midnight dream pump (22:00 – 02:00): If you’re awake for a feed anyway, add a short session before crawling back under the doona; even 40 ml adds up fast.
- Post‑feed “top‑up”: Wait 15 minutes after a daytime feed and pump for 8‑10 minutes per side; this empties leftovers and cues your body to make more.
Over a fortnight, this pattern typically banks 1.5 – 2 litres – plenty for a first full work‑week buffer.
Remember: consistency beats heroics; skip a session now and then, but aim for at least one dedicated stash pump daily.
A Seven‑Day Sample Schedule
Below is a practical Seven‑Day Pumping Schedule for working mums who have already returned to a 9 – 5 office job. Adjust the times to match your commute and workplace breaks.
|
Day |
Early AM (home) |
Mid‑Morning (work) |
Lunch Break (work) |
Mid‑Afternoon (work) |
Evening / Night |
|
Mon - Fri |
Around 6:30 Pump 10–15 min after the first feed |
Around 10:00 10 min each side Or 12 min wearable pump |
Around 12:30 Double‑pump 15 min |
Around 15:30 10 min “top‑up” |
Dream‑pump 10 min before bed On Fridays, skip pumping for a date night and use freezer milk |
|
Sat |
Pump after first feed |
— |
“Power‑hour” double‑pump while partner minds the baby |
— |
Dream‑pump optional |
|
Sun |
Sleep in; skip |
Mid‑morning pump after brunch outing |
— |
Evening top‑up 10 min |
Dream‑pump optional |
Reality: Cluster‑feeding evenings can tank output temporarily. Your bub could also go through the dreaded witching hour (cue 17:00–21:00 fuss‑fest), focus on comfort nursing and skin‑to‑skin, and let stash‑building resume tomorrow.
Getting Gear Savvy: What Do I Need to Build My Breast‑Milk Stash?
Essential Toolkit (Checklist)
- Double‑electric pump for speed and hands‑free multitasking (ideal for daily stash sessions).
- Manual or single‑electric “handy pump” for car trips or the office bathroom when outlets are scarce.
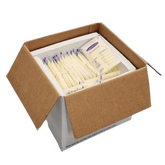
- Breast milk storage bags or reusable silicone containers—pre‑sterilised, leak‑proof, and space‑efficient.
- Sharpie + masking tape for clear labelling (date, volume, AM/PM).
- Freezer space, even a small “ice‑cream compartment” works with flat‑freezing hacks.
- Insulated cooler bag + frozen gel packs for safe transport from pump to fridge.
Space‑Saving Storage Hacks
- Flat‑freeze bags: Lay each bag flat on a baking tray; once frozen, stand them upright like index cards.
- “Milk bricks”: Stack five flat‑frozen bags inside a large zip‑lock to create a labelled “brick” of one workday’s milk.
- Powder conversion: Short on freezer real estate? Send your overflow to Nourishy for freeze‑drying – turns bulky bags into pantry‑friendly powder that lasts up to 3 years.
Store It Like a Pro
Always follow First In, First Out: the oldest milk gets used first. Date every bag, stash the newest behind the older packs, and rotate weekly – that’s half the battle won. Remember to store your milk in the fridge/freezer at the appropriate temperatures and label it accordingly to remember its shelf life to keep your stash safe.
Boosting & Protecting Your Supply While You Build

Stay topped up with plenty of water, some protein‑rich snacks (think bliss balls, Greek yoghurt, or a humble Vegemite sanga), and, when humanly possible, micro‑naps. If your output dips, try the simple “pump‑after‑nurse” trick: nurse, wait 5 minutes, then pump both sides for 8–10 minutes to signal extra demand.
Keep an eye out for oversupply signs, such as painfully full breasts, strong let‑downs, or bub gulping and sputtering. If they crop up, skip the bonus pump for a day or express just enough for comfort. Or if you want to save this oversupply in the short term, you can donate your extra breast milk or choose to freeze‑dry your breast milk.
Worried about undersupply instead? First, check the basics: 8–12 effective feeds in 24 hours, audible swallows, and steady nappy output. If your baby isn’t gaining adequate weight or your pumps yield consistently tiny volumes (< 30 ml combined), reach out to your lactation consultant for a latch check and personalised plan – sometimes a tweak in positioning or an extra middle‑of‑the‑night pump is all it takes to turn things around.
Making It Work at Work
When You’ve Got a Lactation‑Friendly Office or Working From Home
- Set yourself up for effortless sessions: keep a grab‑and‑go kit (double‑electric pump, hands‑free bra, spare flanges, quick‑clean wipes) within arm’s reach.
- Block three non‑negotiable 15‑minute slots—morning tea, lunch, mid‑afternoon—and let phone alarms do the nagging.
- Finished pumping? Pop the bottles straight into an insulated cooler bag with two frozen gel packs; the milk stays ≤ 4 °C until you clock off. Or if you’re at home, pop the milk in storage bags and then the freezer once cooled.
When There’s No Lactation Room (Your DIY Mode)
-
Advocate and improvise – Share Fair Work Act guidelines on lactation breaks with HR, but let your DIY setup guard against skipped sessions in the meantime.
-
Use your parked car – Use a battery‑powered or manual pump, a sunshade for privacy, and keep the A/C running for comfort.
-
Vacant meeting room or storeroom – Pack a lightweight fold‑out “privacy screen” and a door‑stop to prevent walk‑ins.
-
Portable pump and wearable collection cups – Slip under your blouse; express discreetly while answering emails.
-
Cool storage on the go – A 6‑can soft cooler plus two frozen bricks keeps milk ≤ 4 °C for up to 12 h, perfect for an 8-hour work day or long shifts.
When Should I Start Using My Freezer Stash?
Follow the “fresh‑first” rule. Use milk you pumped today for tomorrow’s bottles, and rotate the oldest frozen first so nothing lingers past its prime.
Green‑light moments to dip in
- First full workday away from baby
Growth‑spurt cluster feeds when you can’t pump fast enough
Last‑minute commitments (medical appointment, interstate funeral, long‑haul flight)
Quick thaw and warming basics
- Move the oldest bag from the freezer to the fridge the night before.
- Warm gently in a jug of lukewarm water; avoid boiling and never use the microwave to avoid hot spots.
- Defrost small portions (60‑90 ml) to slash wastage—top up with fresh breast milk if bub is extra hungry.
Train your support crew
Have a checklist or a one‑pager for your partner, grandma and grandpa or childcare. Include thaw steps, swirl (don’t shake) to mix cream, and discard leftovers after two hours at room temp. Partners, grandparents, and daycare staff can get confident; you get peace of mind while your baby still gets 100% of mum‑made nutrition.

Your Stash, Your Freedom
You’ve mapped out how much milk to bank, when to pump, and how to keep your supply humming. Every single millilitre you freeze (or freeze‑dry) buys you flexibility: the freedom to nail that client presentation, sneak in a Pilates class, or simply savour a hot coffee while someone else handles a feed.
With a well‑planned stash, you can step outside the newborn bubble, and baby still gets the good stuff. Remember, progress isn’t measured by litres alone; it’s the confidence you feel each time you zip another labelled bag into the cooler.
Short on freezer space or heading back to work soon? Freeze‑drying with Nourishy keeps your milk shelf‑stable for up to three years – no cooler, no ice, no stress. Explore Freeze‑Drying Options designed for busy Aussie mums.
Frequently Asked Questions About Building Your Stash
What’s the best time of day to pump to build a stash?
Early‑morning sessions (within an hour of the first feed) tap into naturally higher prolactin levels and usually yield the biggest bonus volume with the least effort.
How often should I pump to build a stash while breastfeeding?
Aim for one dedicated “stash session” per day — two if you have a tight deadline (e.g., returning to work in a fortnight). Consistency beats marathon pumping.
How much should I pump each session?
There’s no quota, but most mums collect 60 – 90 ml in a 10 to 15‑minute double‑pump. If you’re getting much less, try the pump‑after‑nurse trick or a short power‑pumping block.
What’s a good freezer stash of breast milk before returning to work?
Enough for one full work‑week is a solid starter: daytime feeds you’ll miss × 1.25 × 5 days (roughly 2 – 2.5 L for a 9‑to‑5 mum). You’ll keep topping it up once you begin pumping at work.
What can I do with leftover freezer stash before it expires?
First, rotate the oldest bags forward, then:
- Donate to a screened milk bank if you meet their health criteria, such as Mothers Milk Bank
- Make Baby Food by mixing breast milk with pureed fruits and vegetables
- Freeze‑dry with Nourishy to extend shelf‑life up to three years (perfect for travel, returning to work or emergencies).
- Once expired, you can make a milk bath for your baby.